DIY Decorative Garden Stepping Stones
How to: DIY Decorative Stepping Stones for Your Garden
Creating decorative stepping stones is a fun and rewarding DIY project that adds a personal touch to your garden. This guide will help you craft unique and beautiful stepping stones using materials available from Stone & Water World.
In this guide, we’re experimenting with a method inspired by our favourite artist, John Botica of Power of Pebble. This technique involves placing a layer of sand at the bottom of the mould, arranging the pebble design on the sand, and then pouring the concrete mix on top.
The sand layer serves multiple purposes: it helps keep the pebbles in place when the concrete is poured, makes it easier to release the stone once set, and ensures a smooth, flat, dark-coloured concrete surface. This dark surface creates a striking contrast with lighter-coloured pebbles and other decorative elements, enhancing the overall visual appeal of your stepping stones.
Now, let's get started with the steps to create your own decorative stepping stones.
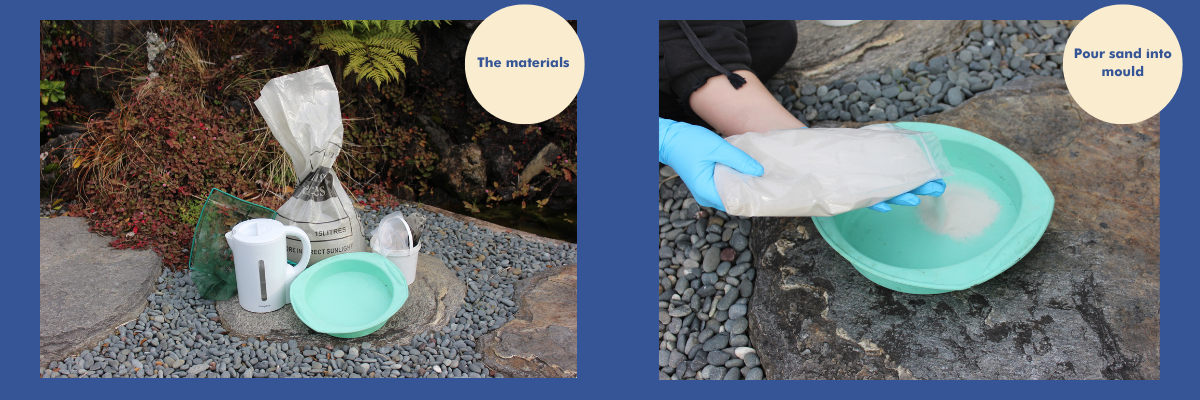
What materials are required to make your stepping stones?
- Concrete Mix
- Available from our neighbours, Mitre 10 MEGA Albany and Mt Wellington.
- Stepping Stone Moulds or Silicone Trays
- Stepping stone moulds are available online.
- DIY alternative - Silicone baking or cake trays work well as stepping stone moulds. We got ours from The Warehouse (which is placed conveniently close to both our Mt Wellington and Albany stores).
- Decorative Elements
Select your favourite items from this list. - Pebbles - available at Stone and Water World
- Decorative Glass available at Stone & Water World
- Gass Beads & Ceramic Beads - available at The Warehouse Mt Wellington / Albany.
- Mosaic tiles, shells, or any other decorative items
- Release Agent
- Sand placed at the bottom of the mould
- Cooking oil spray (to spray sides of moulds for easy release)
- Bucket and Mixing Tools
- For mixing the concrete
- Protective Gear
- Gloves and safety glasses
Step-by-Step Instructions
1. Prepare Your Work Area
- Choose a well-ventilated area to work in.
- Lay down a tarp or newspaper to protect surfaces from any concrete spills.
- Put on safety/latex gloves and safety glasses.
2. Select and Prepare the Moulds
- Choose Moulds: Stepping stone moulds come in various shapes and sizes. You can use moulds specifically designed for stepping stones or improvise with items like silicone or metal cake pans or pie tins. We have found that silicone trays are easier to work with than metal cake pans or tins, however if you are at a pinch and need to use these, the sand placed at the bottom of the tin will assist with removing your stepping stone. The size and shape of your mould/s completely depends on how you want your stepping stones to turn out.
- Release Agent: If using a metal mould, apply a release agent (cooking spray or petroleum jelly) to the inside walls of the moulds, this helps to ensure the stones can be easily removed once they are set.
- Release Agent: If using a metal mould, apply a release agent (cooking spray or petroleum jelly) to the inside walls of the moulds, this helps to ensure the stones can be easily removed once they are set.
- Pour Sand: Pour an approx. 0.5-1.0cm layer of sand into the bottom of the mould (or enough for the pebbles/decorations to sit halfway into the sand), this will be the base we use to hold our design in place when we pour the concrete.
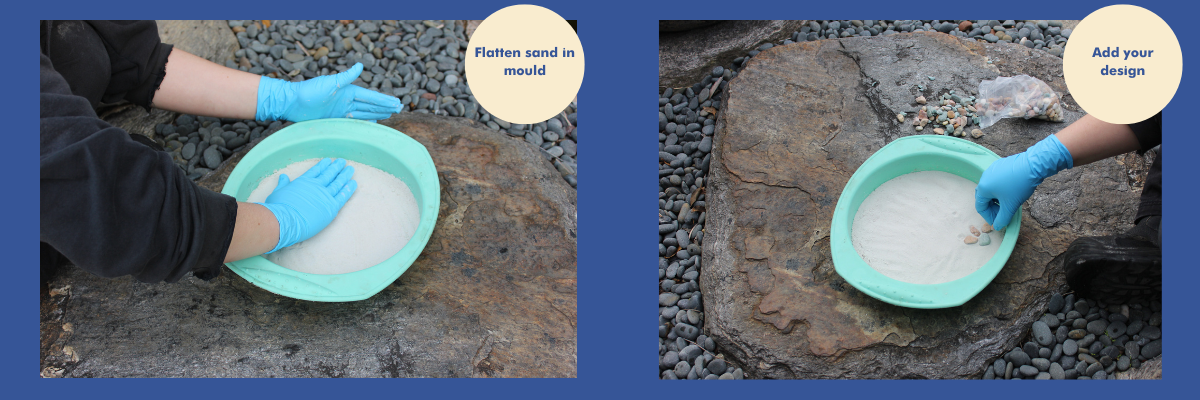
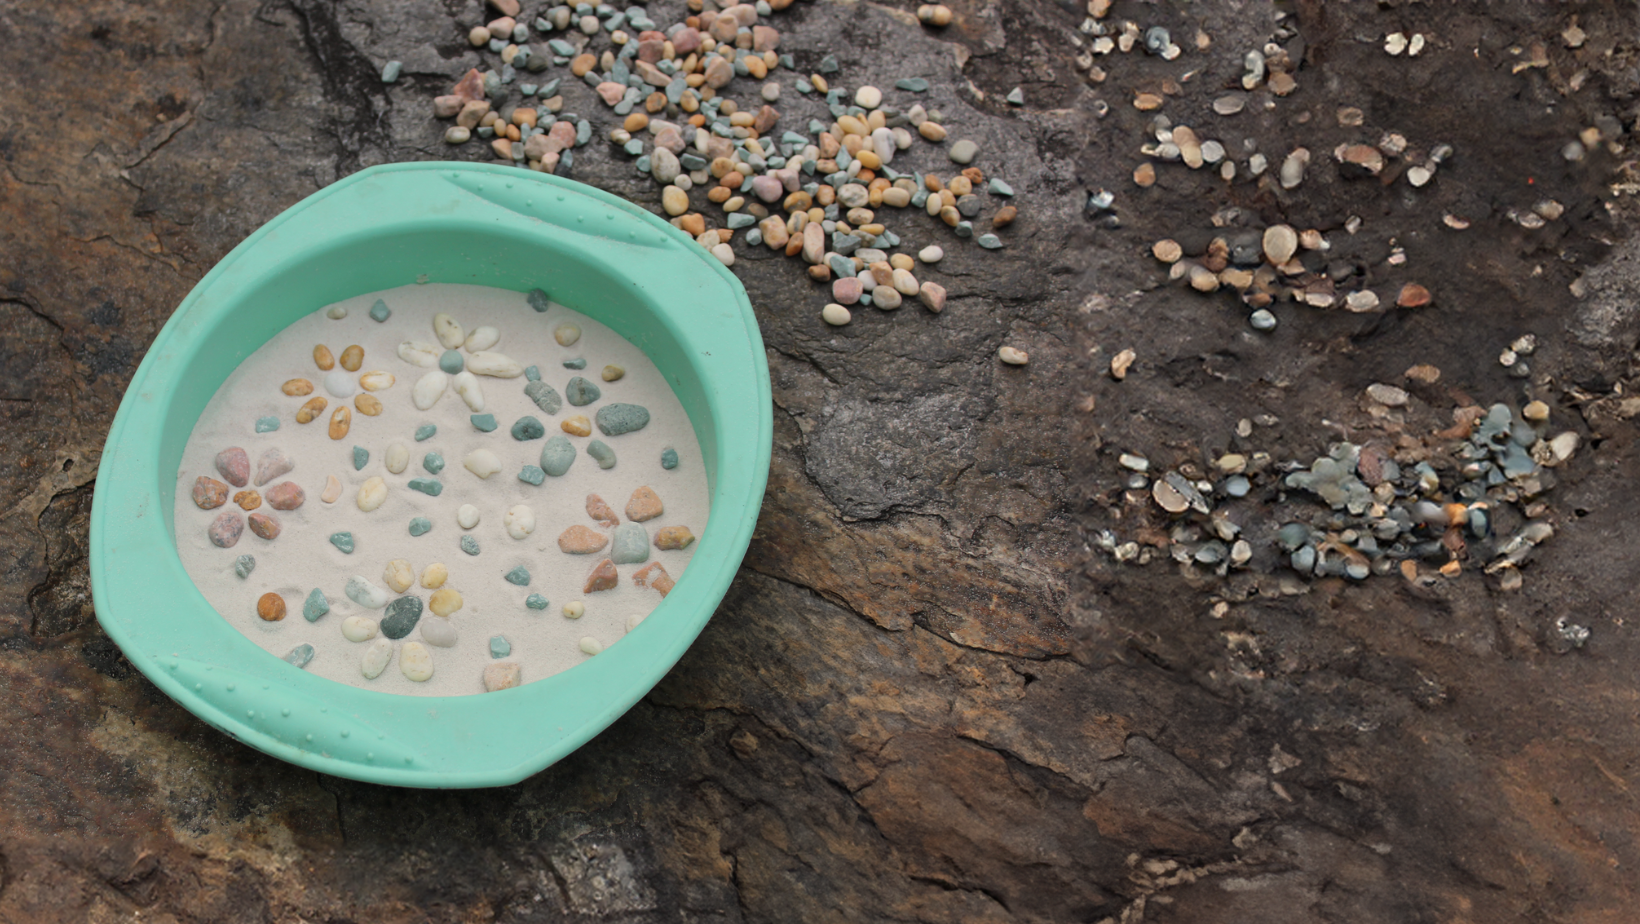
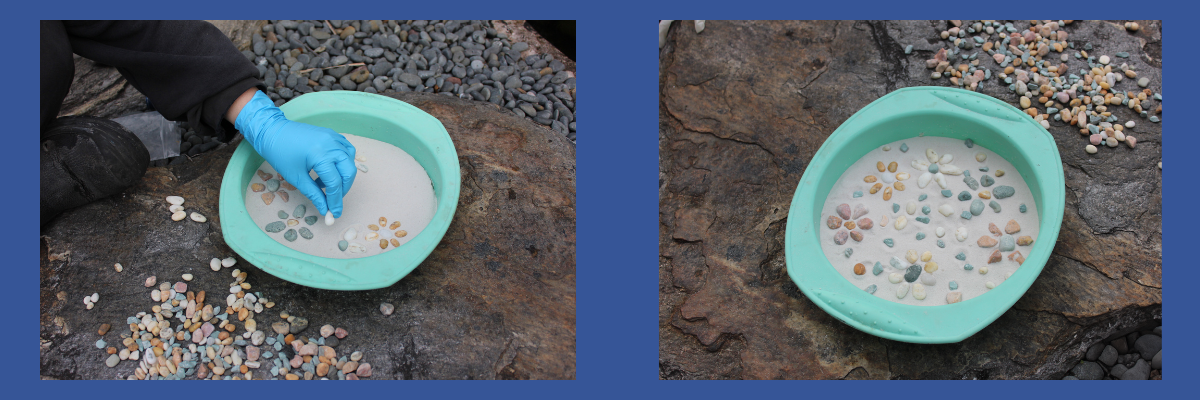
3. Make your Design
- Design your Stones: Gently press your decorative elements into the sand making sure not to completely bury the items. You can create patterns, write names, or make random designs. Ensure the decorative items are at least half exposed, these are the parts that stick and set into the concrete (the deeper the items are set in the sand, the further they will stick out of the top of the stepping stone).
- Smooth Surface: Use a small tool or your hands (wearing gloves) to smooth out the surface of the sand around the decorations.
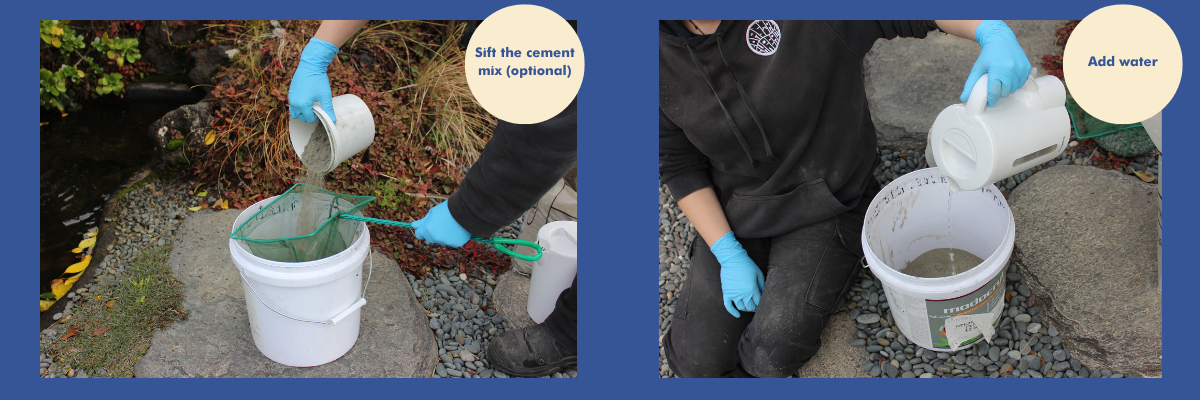
4. Mix the Concrete
- Follow Instructions: Mix the concrete according to the bag’s instructions. Optional: We chose to strain out the small gravel stones in the mix with netting, we did this to allow a smooth finish. Typically, you'll combine the concrete mix with water in a bucket and stir until it reaches a thick, smooth consistency. Add the water gradually to avoid making the mix too runny.
- Consistency Check: The mixture should be thick enough to hold its shape but not too dry. Properly mixed concrete should look like thick oatmeal and should hold its shape when it is squeezed in a gloved hand. If you’d like further guidance, here’s a video demonstrating the whole process. If you’d like to compare the consistency of your concrete mix, here’s the video we used.
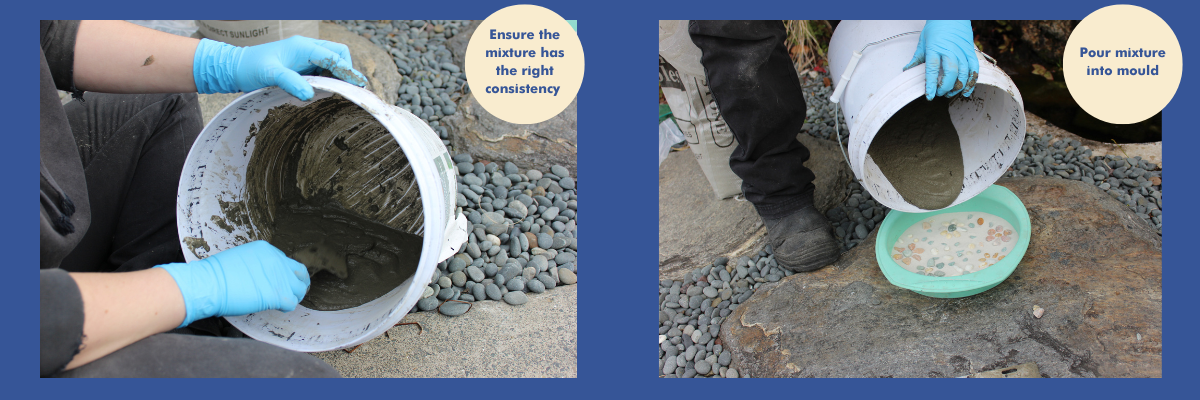
5. Pour the Concrete
- Fill the Moulds: Carefully pour the concrete mixture into the prepared moulds on top of your sand and design, filling them about halfway, or until you’ve reached your desired thickness.
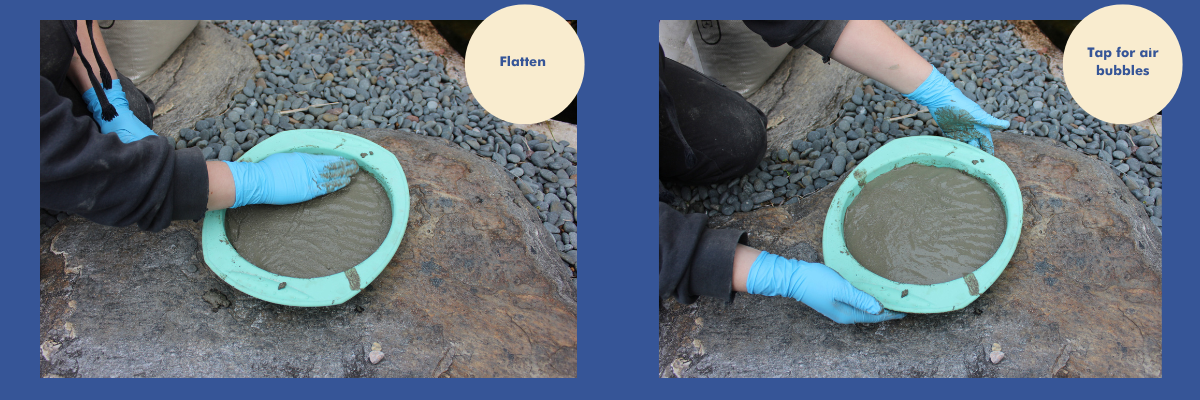
- Tapping for Air Bubbles: Gently tap the sides of the moulds to release any air bubbles trapped in the concrete. This helps ensure a smooth surface.
6. Cure the Stepping Stones
- Setting Time: Allow the concrete to set according to the manufacturer's instructions, usually 24-48 hours.
- Covering (optional): Cover the moulds with plastic wrap to help retain moisture during the curing process, which can prevent cracks.
7. Removing the Stepping Stones
- Carefully Unmould: Once the concrete is fully cured, gently remove the stepping stones from the moulds. If you used a release agent, they should pop out easily.
- Finishing Touches: If needed, sand the edges of the stepping stones to smooth out any rough areas. Rinse off the stepping stone/s to remove the sand, use a brush to scrub off any stubborn bits
8. Place the Stepping Stones
- Plan Your Path: Lay out your stepping stones in your garden to create a functional and aesthetically pleasing path. Ensure they are placed securely and level to prevent tripping. If your stepping stones are becoming slippery, we recommend a regular clean to remove organic matter buildup.

Tips for Success
- Creative Designs: Experiment with different decorative elements and designs. You can involve children in the decorating process for a fun family activity.
- Proper Safety: Always wear protective gear, including gloves and safety glasses, when working with concrete.
- Weather Considerations: If working outdoors, choose a day with mild weather to avoid extreme heat or cold, which can affect the curing process.
Our recommended pebbles (what looks best against the concrete)
Creating decorative stepping stones is an enjoyable project that adds a personal and unique touch to your garden. With materials from Stone & Water World and our neighbours, Mitre 10 Mega and the Warehouse, you can easily create beautiful and functional paths that enhance your outdoor space.
For more products and ideas for your next project, visit Stone & Water World.
If you have enjoyed this blog, you might also enjoy:
- How to: Create a stone & pebble pathway
- A guide to New Zealand Schist, Pebble and Riverstone
- Long Weekend DIY Projects
- How to: Build a Rockery